Billing is where a month of approved hours becomes money owed. In Timix.AI the Billing Review wizard walks you through it in four steps — pick a customer, choose which approved entries to bill, relate the invoice to a purchase order, and preview the draw-down — and ends with a commercial invoice you can send. This tutorial walks the whole flow.
💡 Invoicing is a Professional+ feature, and Billing Review only bills Approved, Time & Materials hours. If your entries are still Draft or Submitted, approve them first (the approval workflow tutorial covers that) — otherwise there will be nothing to bill.
1. Open Billing Review and pick a customer
Go to Reports → Billing Review. The first step lists every customer; choose the one you’re billing.
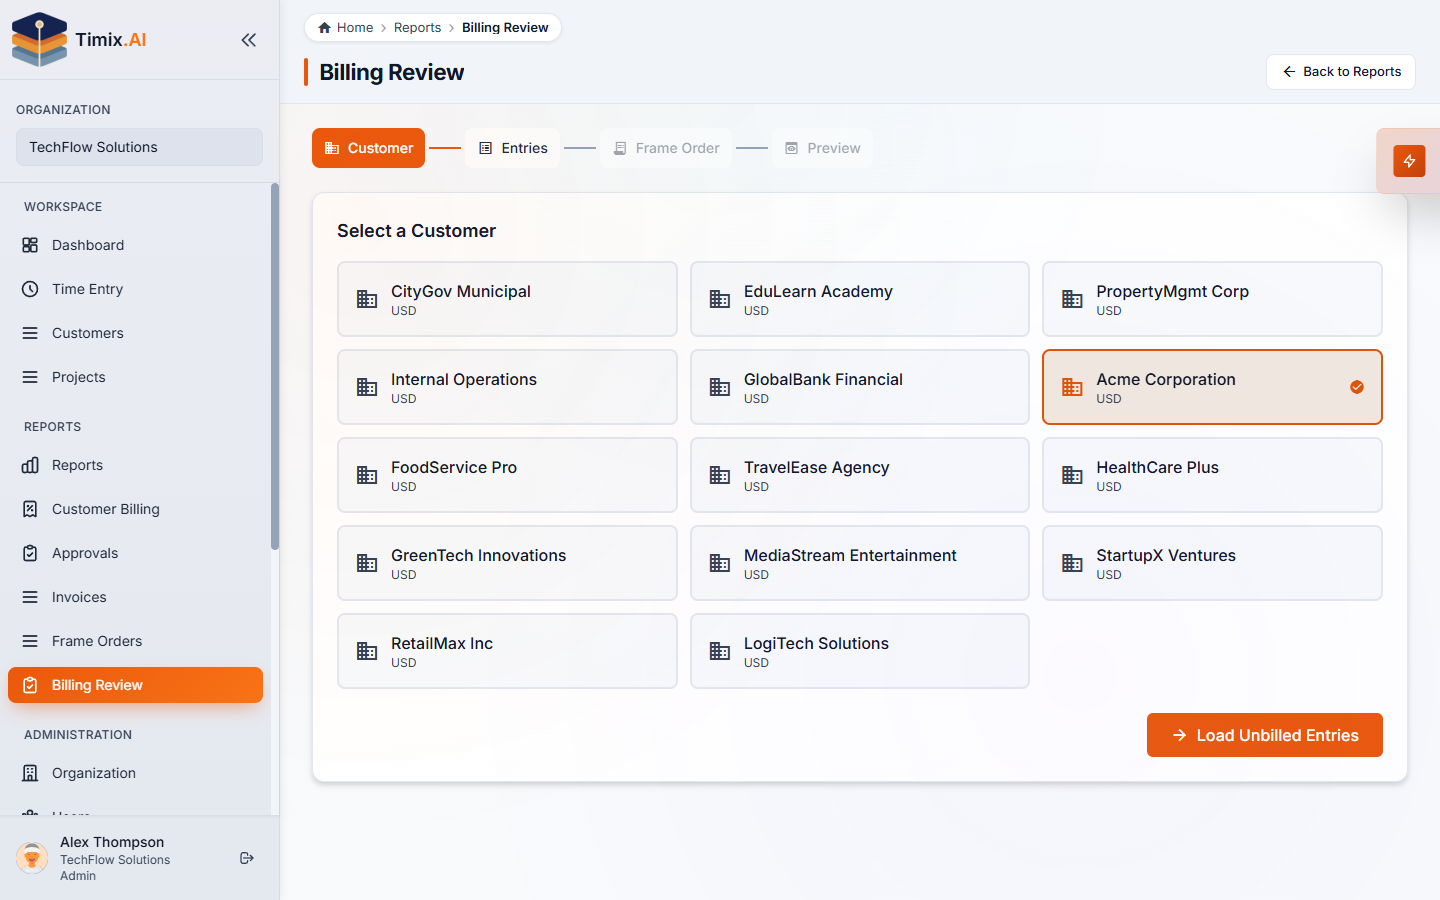
Then click Load Unbilled Entries to pull that customer’s approved, not-yet-billed hours.
2. Choose which entries to bill
The Entries step lists every approved, unbilled Time & Materials entry for the customer, with its date, the project/task it belongs to, the hours, and the amount at the bill rate. The summary tiles at the top show the totals you’re about to bill.
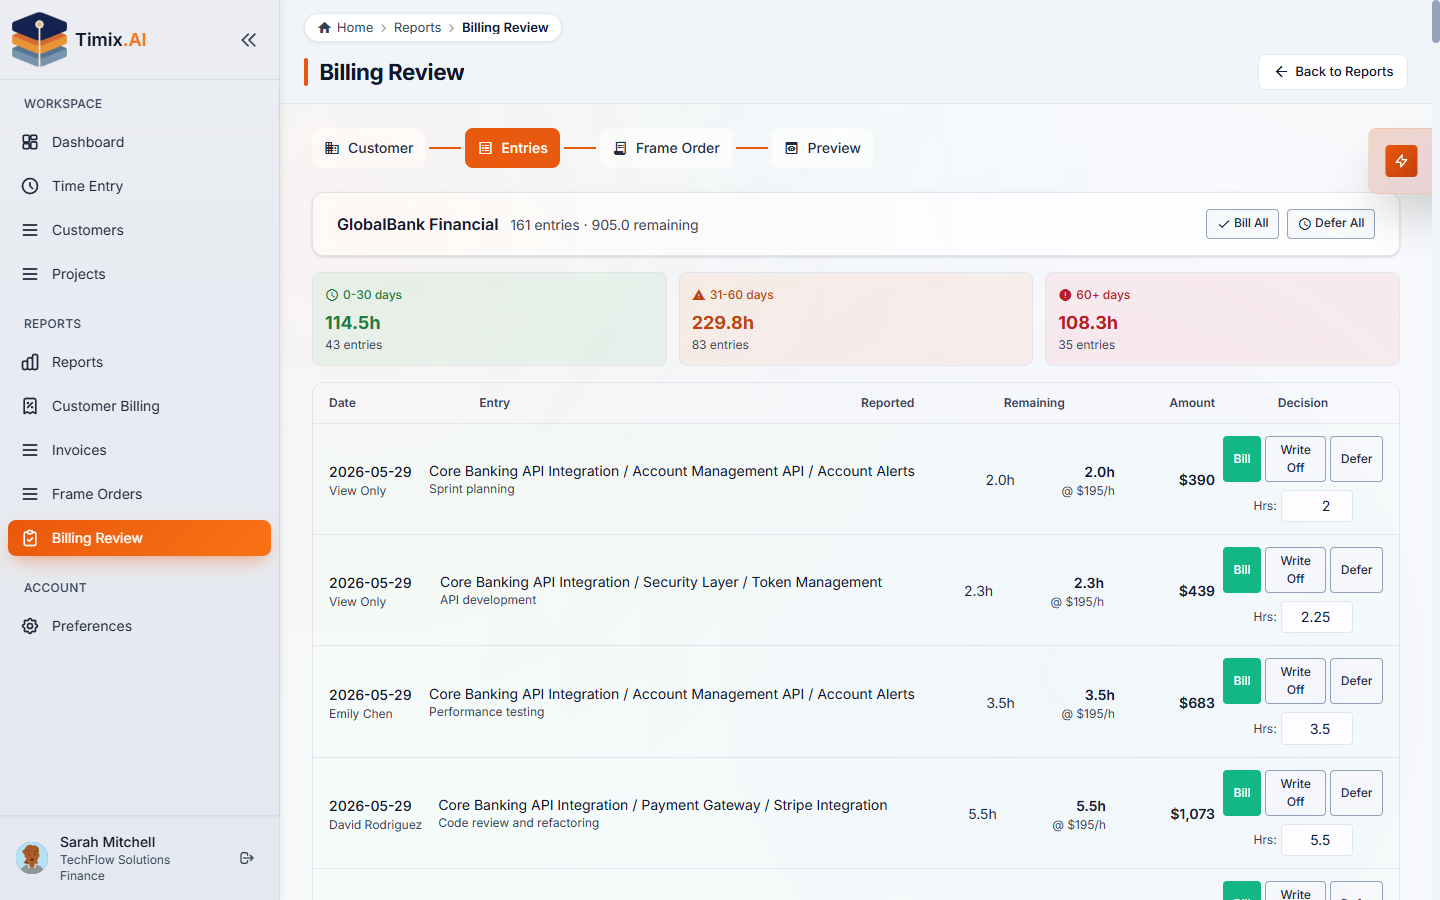
Each row has a Bill / Defer decision, and Bill All / Defer All let you set them in one click:
- Bill — include the entry on this invoice.
- Defer — hold it for a later billing cycle (the hours stay unbilled and carry forward, so nothing is lost).
This is where you “bill exactly what you choose” — include the hours that are ready and defer the rest. When the decisions look right, click Next: Frame Order.
3. Relate the invoice to a frame order (PO)
If the customer works against a frame order — a blanket purchase order, i.e. a pre-agreed pool of hours — link the invoice to it here so the bill draws down that balance. The step shows each open frame order for the customer with its available hours, plus a projected impact of this invoice.
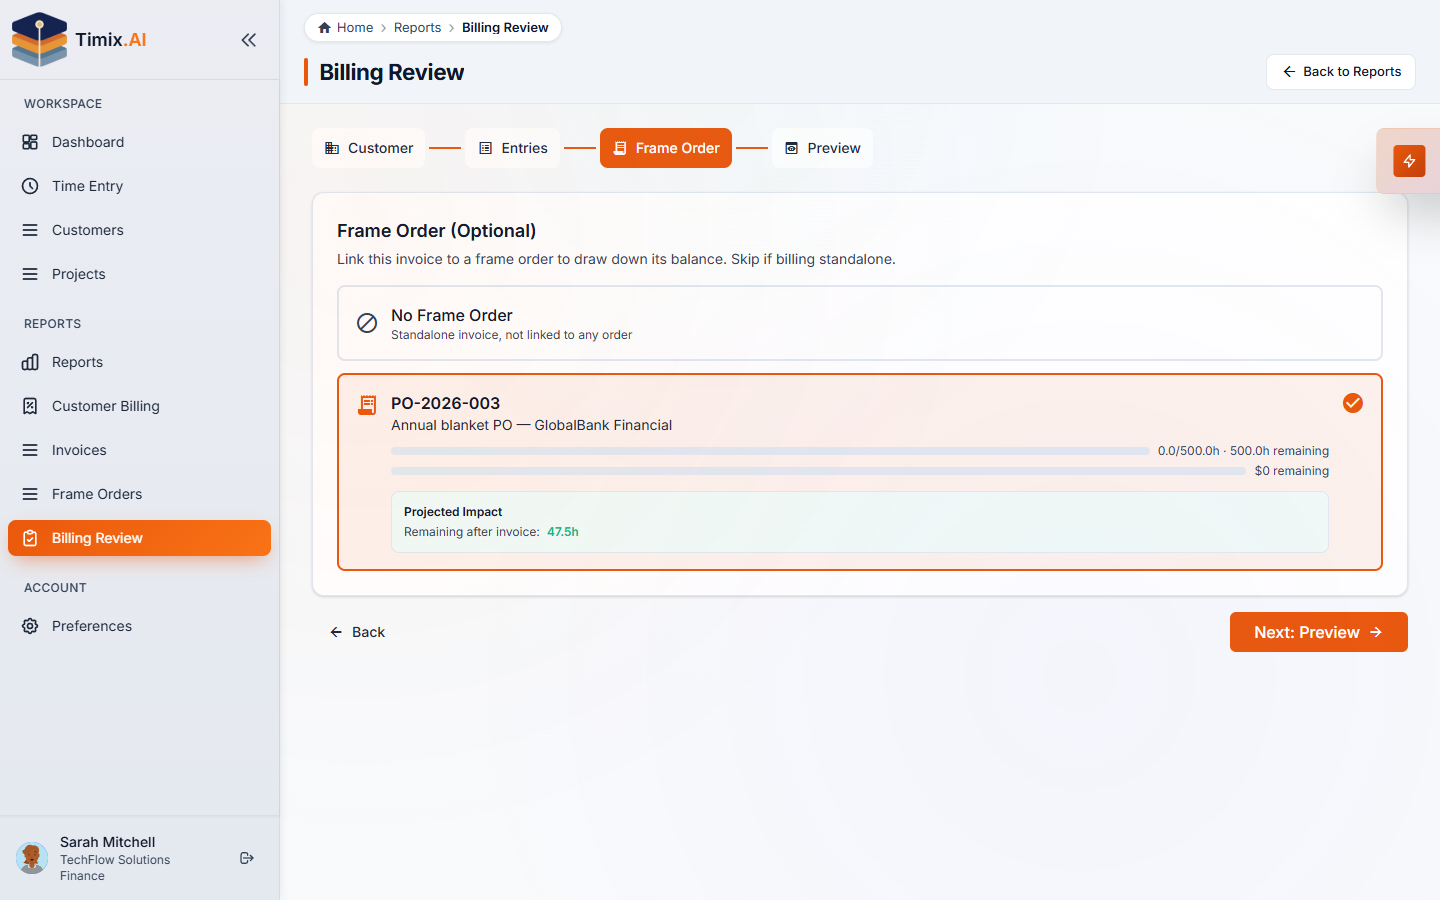
Pick the matching PO to draw it down, or choose No Frame Order to issue a standalone invoice. Then click Next: Preview.
4. Preview and generate the invoice
The Preview step is the final check before you commit. Invoice Options lets you set the period, payment terms, an optional PO number, and notes; the Billing Review Summary shows the hours being billed, anything written off or deferred, the subtotal and total — and, when a frame order is linked, the draw-down impact (hours drawn from the PO and the balance remaining after).

When everything looks right, click Generate & Issue Invoice. Timix.AI creates the invoice, assigns it the next gapless invoice number, draws down the frame order, and freezes the document so the numbers can’t shift after the fact.
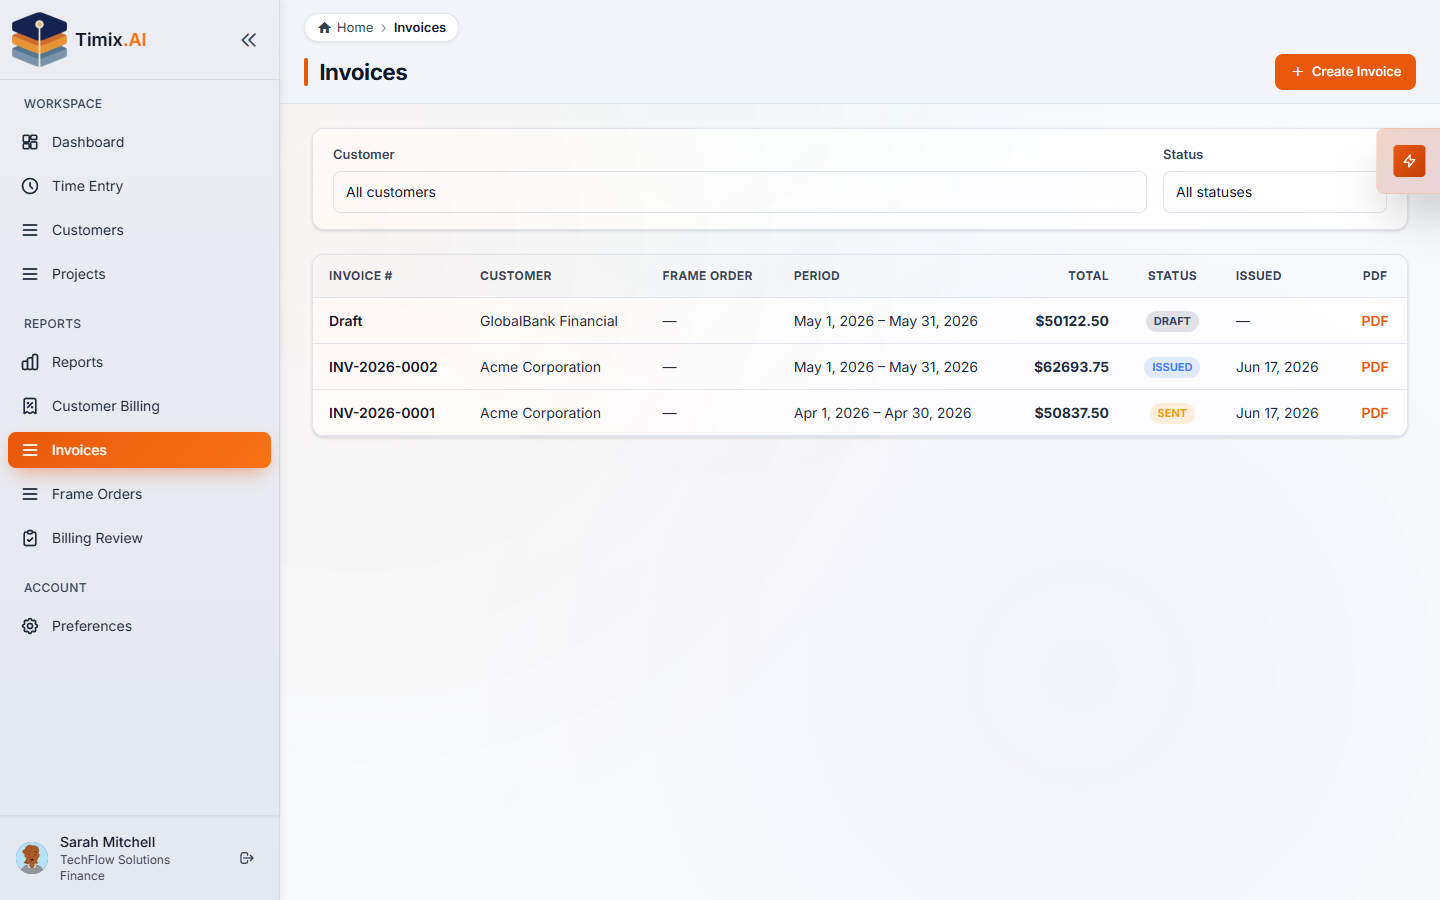
5. Your invoices and frame-order utilization
Every invoice you create lives on the Invoices page (under Reports), where it moves through a clear lifecycle — Draft → Issued → Sent → Paid (or Void) — and can be filtered by customer and status and exported as a branded PDF.
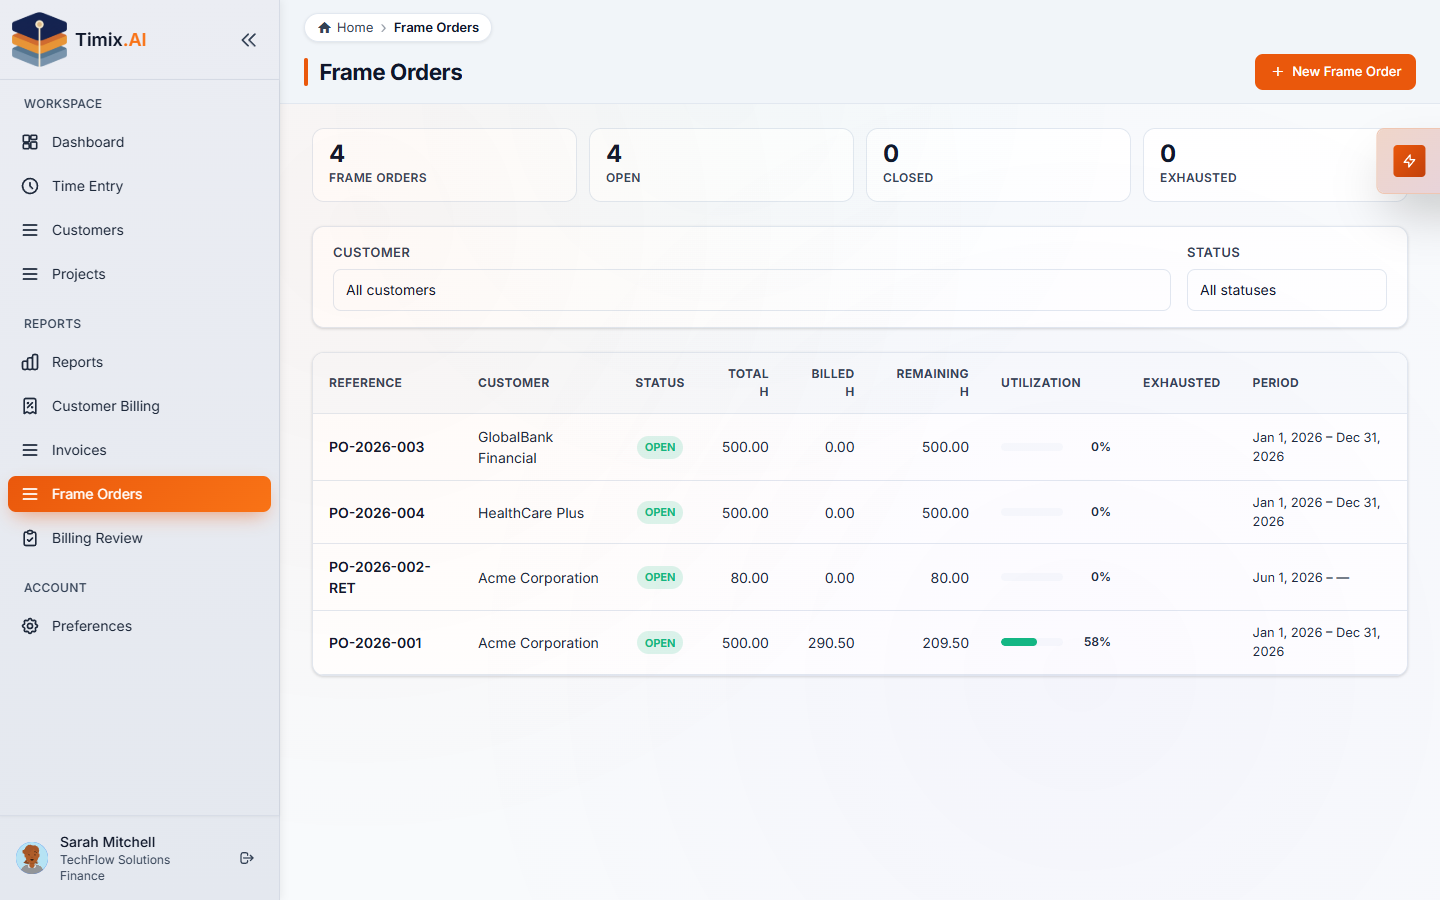
And on the Frame Orders page, each blanket PO shows its live utilization — total, billed, and remaining hours — updating every time you bill against it, so you always know how much of a customer’s commitment is left.
That’s the full month-end billing flow: approved hours in, a clean commercial invoice out, with every purchase order drawn down and every unbilled hour accounted for.