Setting up a new Timix.AI workspace takes about ten minutes. This tutorial walks the essentials — creating your account, telling Timix.AI where and in what currency you work, and following the setup checklist — so you finish with a live organization that’s ready to track its first billable hour.
1. Create your account
Open the sign-up page and create your account. You can register with an email address and password, or use Continue with Google or Continue with Microsoft if you’d rather not manage another password. Every new workspace starts on a free trial — no credit card required.
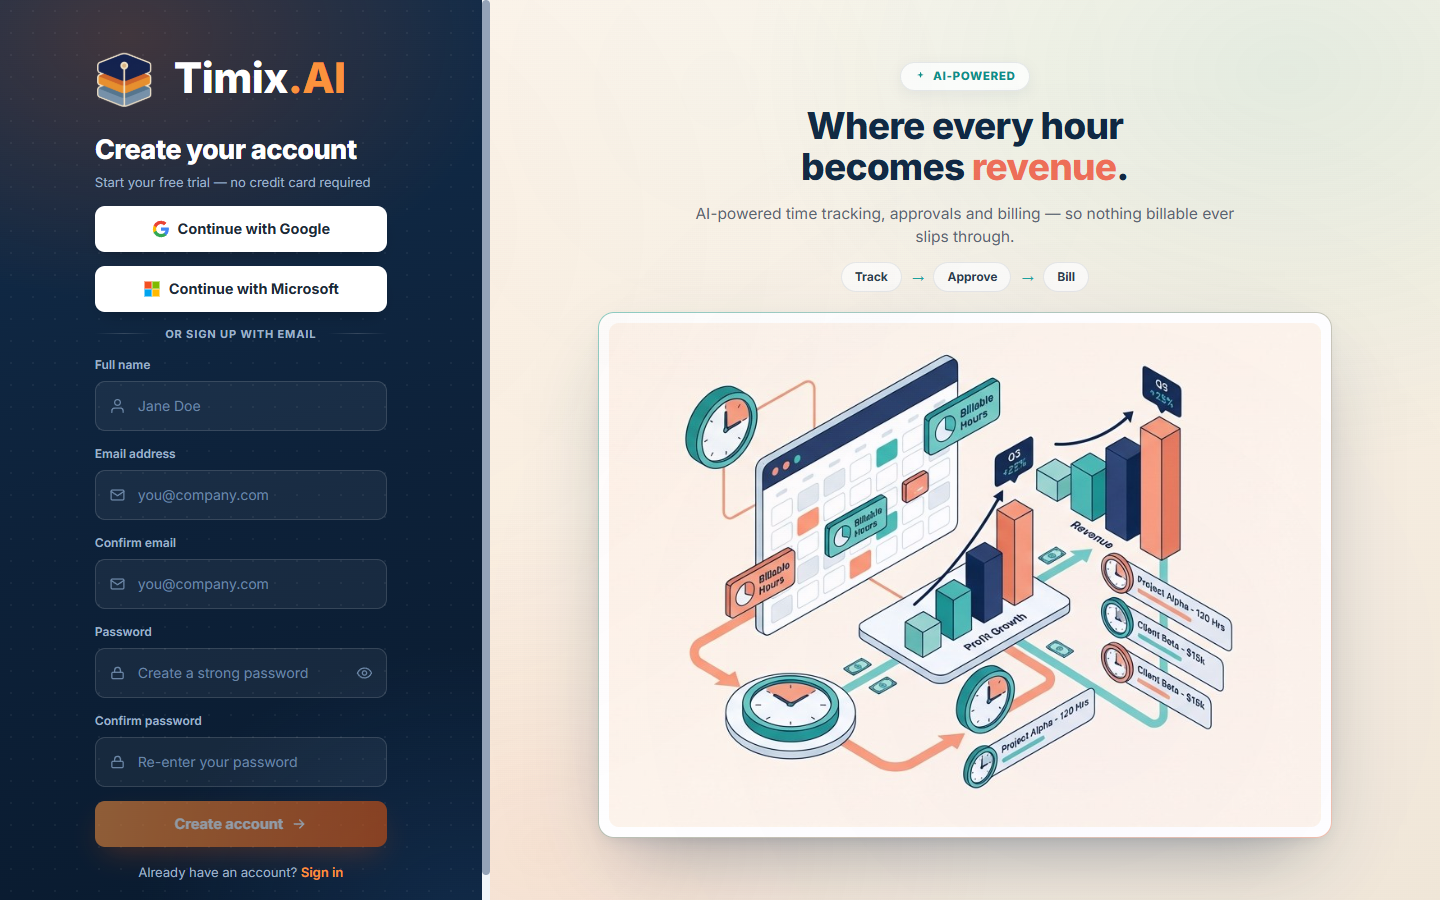
If you register with email and password, choose a strong one — the form tells you when it meets the policy.
2. Verify your email
Timix.AI sends a verification link to your address. You can start setting up right away — there’s a short grace period, and the app shows a reminder banner until you confirm. Open the email and click the link to verify (check your spam folder if it doesn’t arrive).
3. Create your organization
Next, set up your organization — the top of everything you’ll build. Give it a name, and set the three things that anchor every report and invoice that follows:
- Country — your organization’s primary country.
- Base Currency — the currency your rates, budgets, and invoices are expressed in.
- Time Zone — determines which calendar day a time entry belongs to (Timix.AI even pre-fills your detected zone).
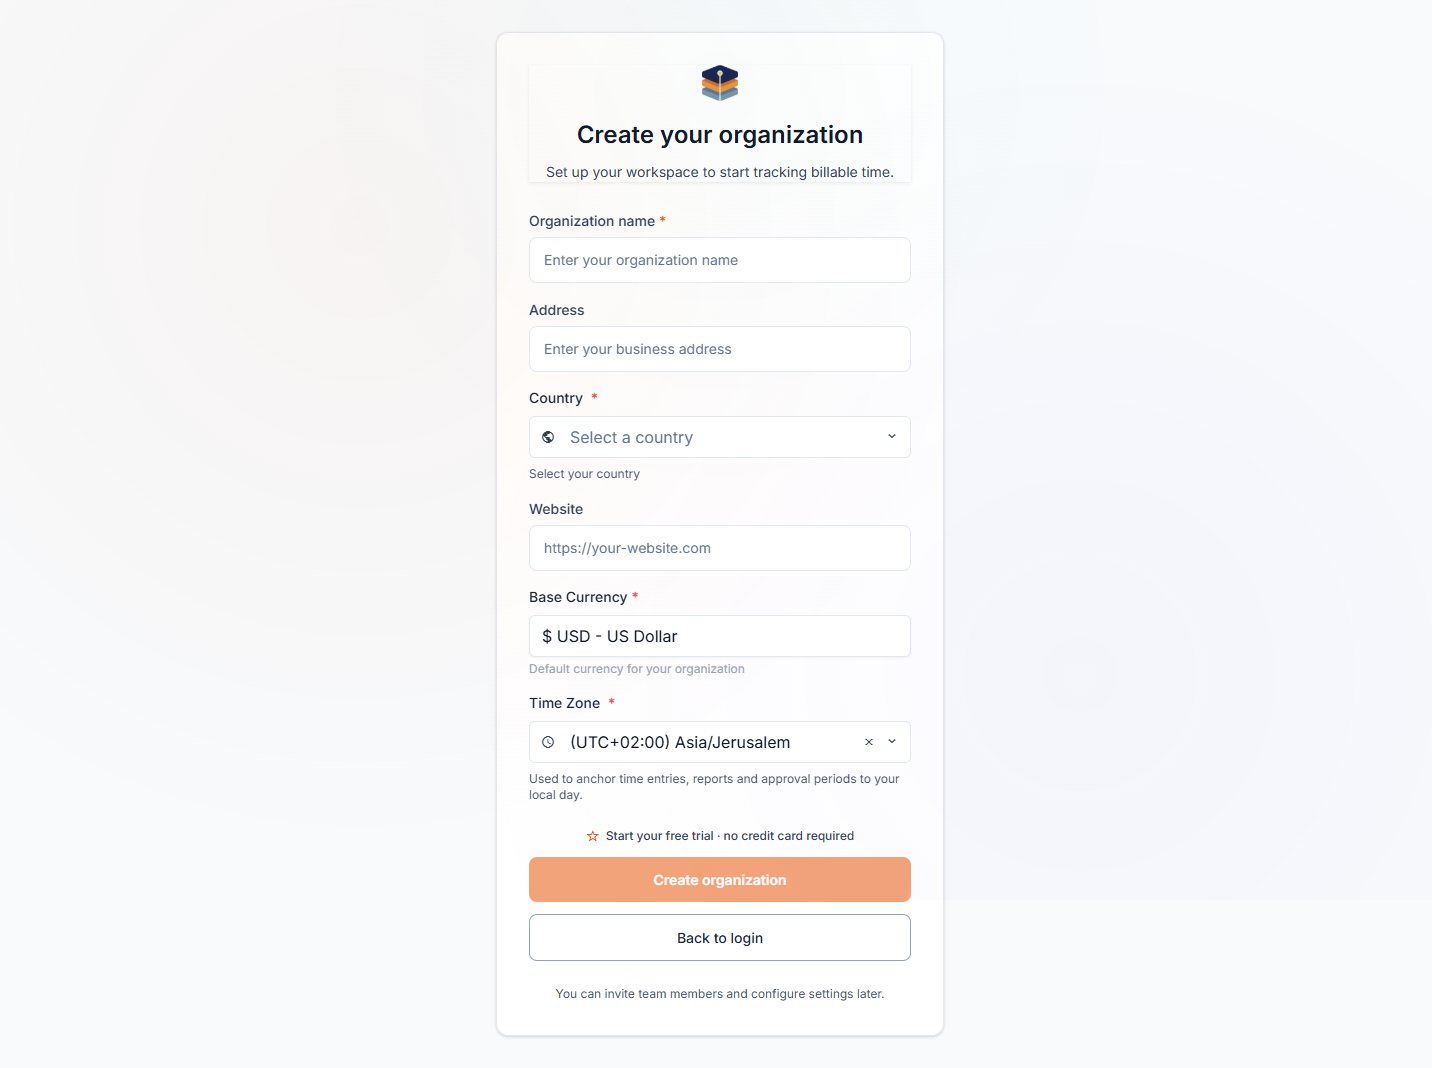
Click Create organization and your workspace goes live on its free trial.
4. Get set up and invite your team
You land on your new workspace with a setup checklist that walks the first things to do — in the exact order the hierarchy is built:
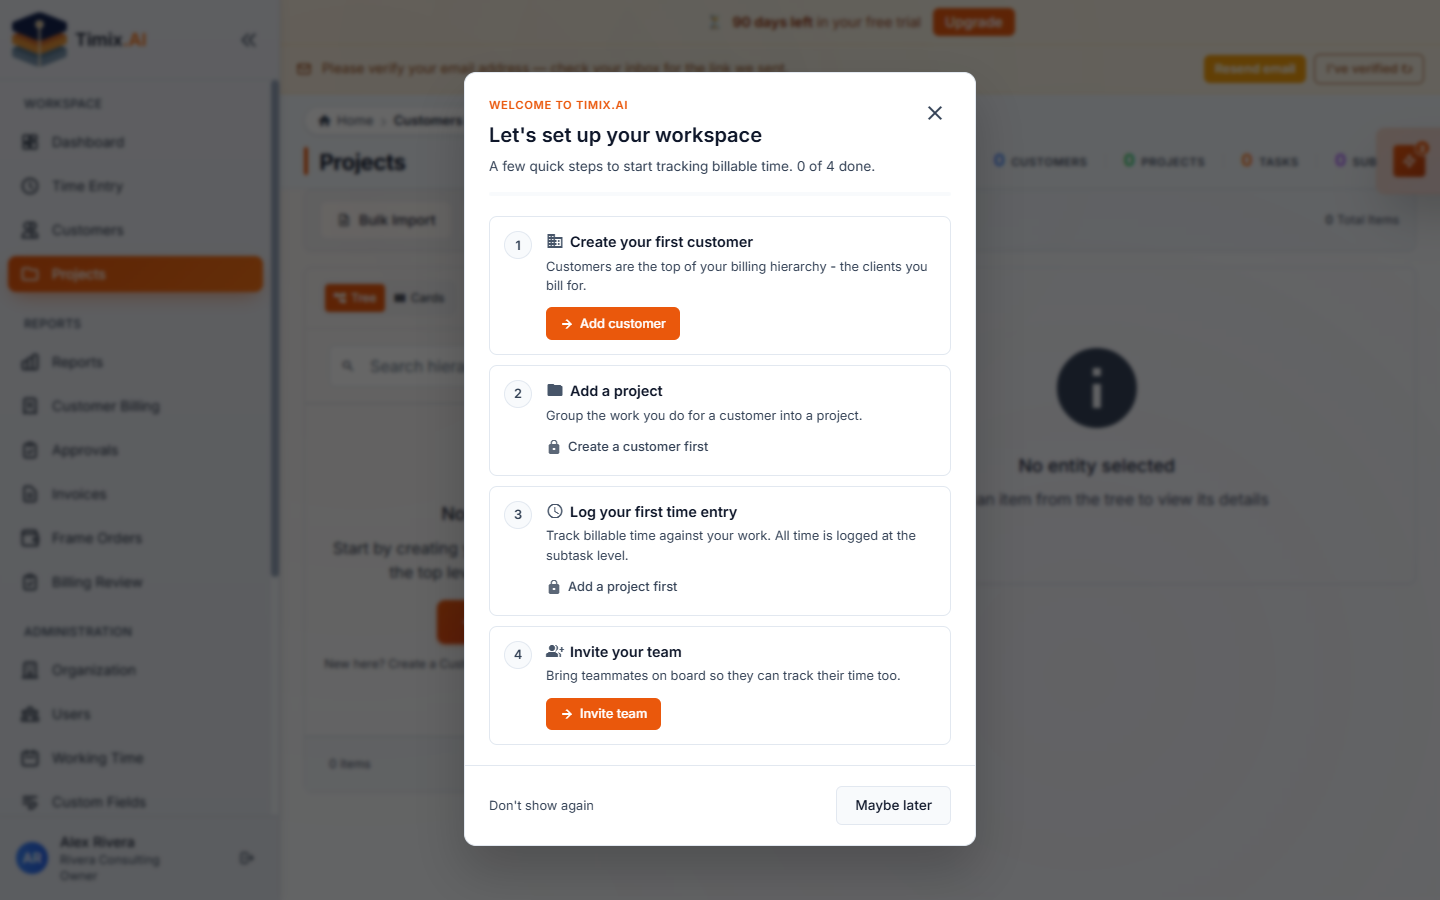
- Create your first customer — the top of your billing hierarchy (the clients you bill).
- Add a project — group the work you do for that customer.
- Log your first time entry — all time is logged at the subtask level.
- Invite your team — bring teammates on board (Organization → Users) so they can track their time too, each with the right role.
That’s it — your workspace is live and ready. The natural next step is understanding the structure everything hangs off: the customer → project → task → subtask hierarchy.